This series details the eclipse-chasing exploits of our President and CEO, Chad Dorsey, as he heads down to Tennessee on a quest for the total solar eclipse. See the whole series.
As we prepare to enter Tennessee, we’re paying some attention to the other aspects of prepping for a total solar eclipse in our Prepping 101 mini-guide. This preparation really, boils down to three main stages: 1) Picking the site, 2) Prepping for partial phases, and 3) Prioritizing plans for totality. This second post in the min-guide describes some advanced preparation steps for safe eclipse viewing during the partial phases, and includes some DIY tips you can use no matter where you live…
Prepping for the Partial Phases
With the site secured, an eclipse chaser can rest calmly for quite a while, dreaming of the big day. As the countdown turns to months or weeks remaining, however, there are a few important preparations. A large part of these concern preparation for the phases prior to totality. During the time prior to and following a total solar eclipse, the sun is partly blocked by the disc of the moon, with the amount of blockage gradually increasing (or decreasing) across the period of an hour or so. For our site in Gallatin, TN, the moon’s disc will contact the sun at 11:59:01 local time, and the partial phases prior to totality will last one hour, 28 minutes and 23 seconds. (Following totality, the partial phases will be four minutes and 17 seconds shorter.) If you’re interested in extensive detail on this, Stephen Wolfram’s highly comprehensive write-up at Wired.com on the history and science of eclipse prediction is very worth a read.
During these phases, as anyone who has seen practically any eclipse news has learned, the sun is still exposed and either a filter or an indirect observation is essential for safe viewing. Though we didn’t need to plan five years in advance for the purchases, we did do our purchasing before the major shortages hit. Of course, we weren’t immune from the controversial Amazon recall, but had also picked up a couple boxes of Wirecutter’s top-rated Celestron 2x magnifying glasses, and also managed to scrounge in our closet and turn up a couple pairs of the glasses Vernier gave away as promos at NSTA.

However, any eclipse hound (in fact, pretty much any astrophile) knows that the interesting things about the sun are best seen magnified in some way. Sunspots, storms on the surface of the sun, change daily as part of the 11-year sunspot cycle and can be related to the formation of the gorgeous prominences sometimes visible during a total eclipse. This means that watching the partial phases of the eclipse at higher magnification can sometimes offer insight into what the total phases will look like (which, incidentally, not even astronomers have typically been able to predict what totality will look like until the moment itself happens, though that’s finally changing somewhat). Plus, it’s just fun to see things more close up in the exciting hour prior to totality. To observe these partial phases more closely, eclipse chasers typically make their own filters for existing optical equipment. I purchased a couple squares of filter material from the longstanding solar filter experts at Thousand Oaks Optical and spent part of a pre-trip late night making my own DIY filter sets for a couple pair of binoculars we are bringing along.
The key to DIY filter making is that pretty much anything will do, as long as the filter covers the optics completely and is located on the far end of the optics. That latter part is essential—locating the filter material on the eyepiece side of optics can focus concentrated light from the sun onto the filter material and compromise its integrity, causing dangerous viewing conditions. The folks at Thousand Oaks note that the simplest way to make a filter is to wrap the filter material onto the lens and secure it with a rubber band. That’s a great, simple solution, but offers problems with the third part of our preparation, making plans for totality—we want a solution that allows us to watch right up until the precious moments of the diamond ring effect and then to immediately transition to viewing the beauty of the total eclipse fully unfiltered. For that, we’ll need a filter that stays on securely as the optics are passed around during the long partial phases, but can be removed very quickly and easily when totality hits.
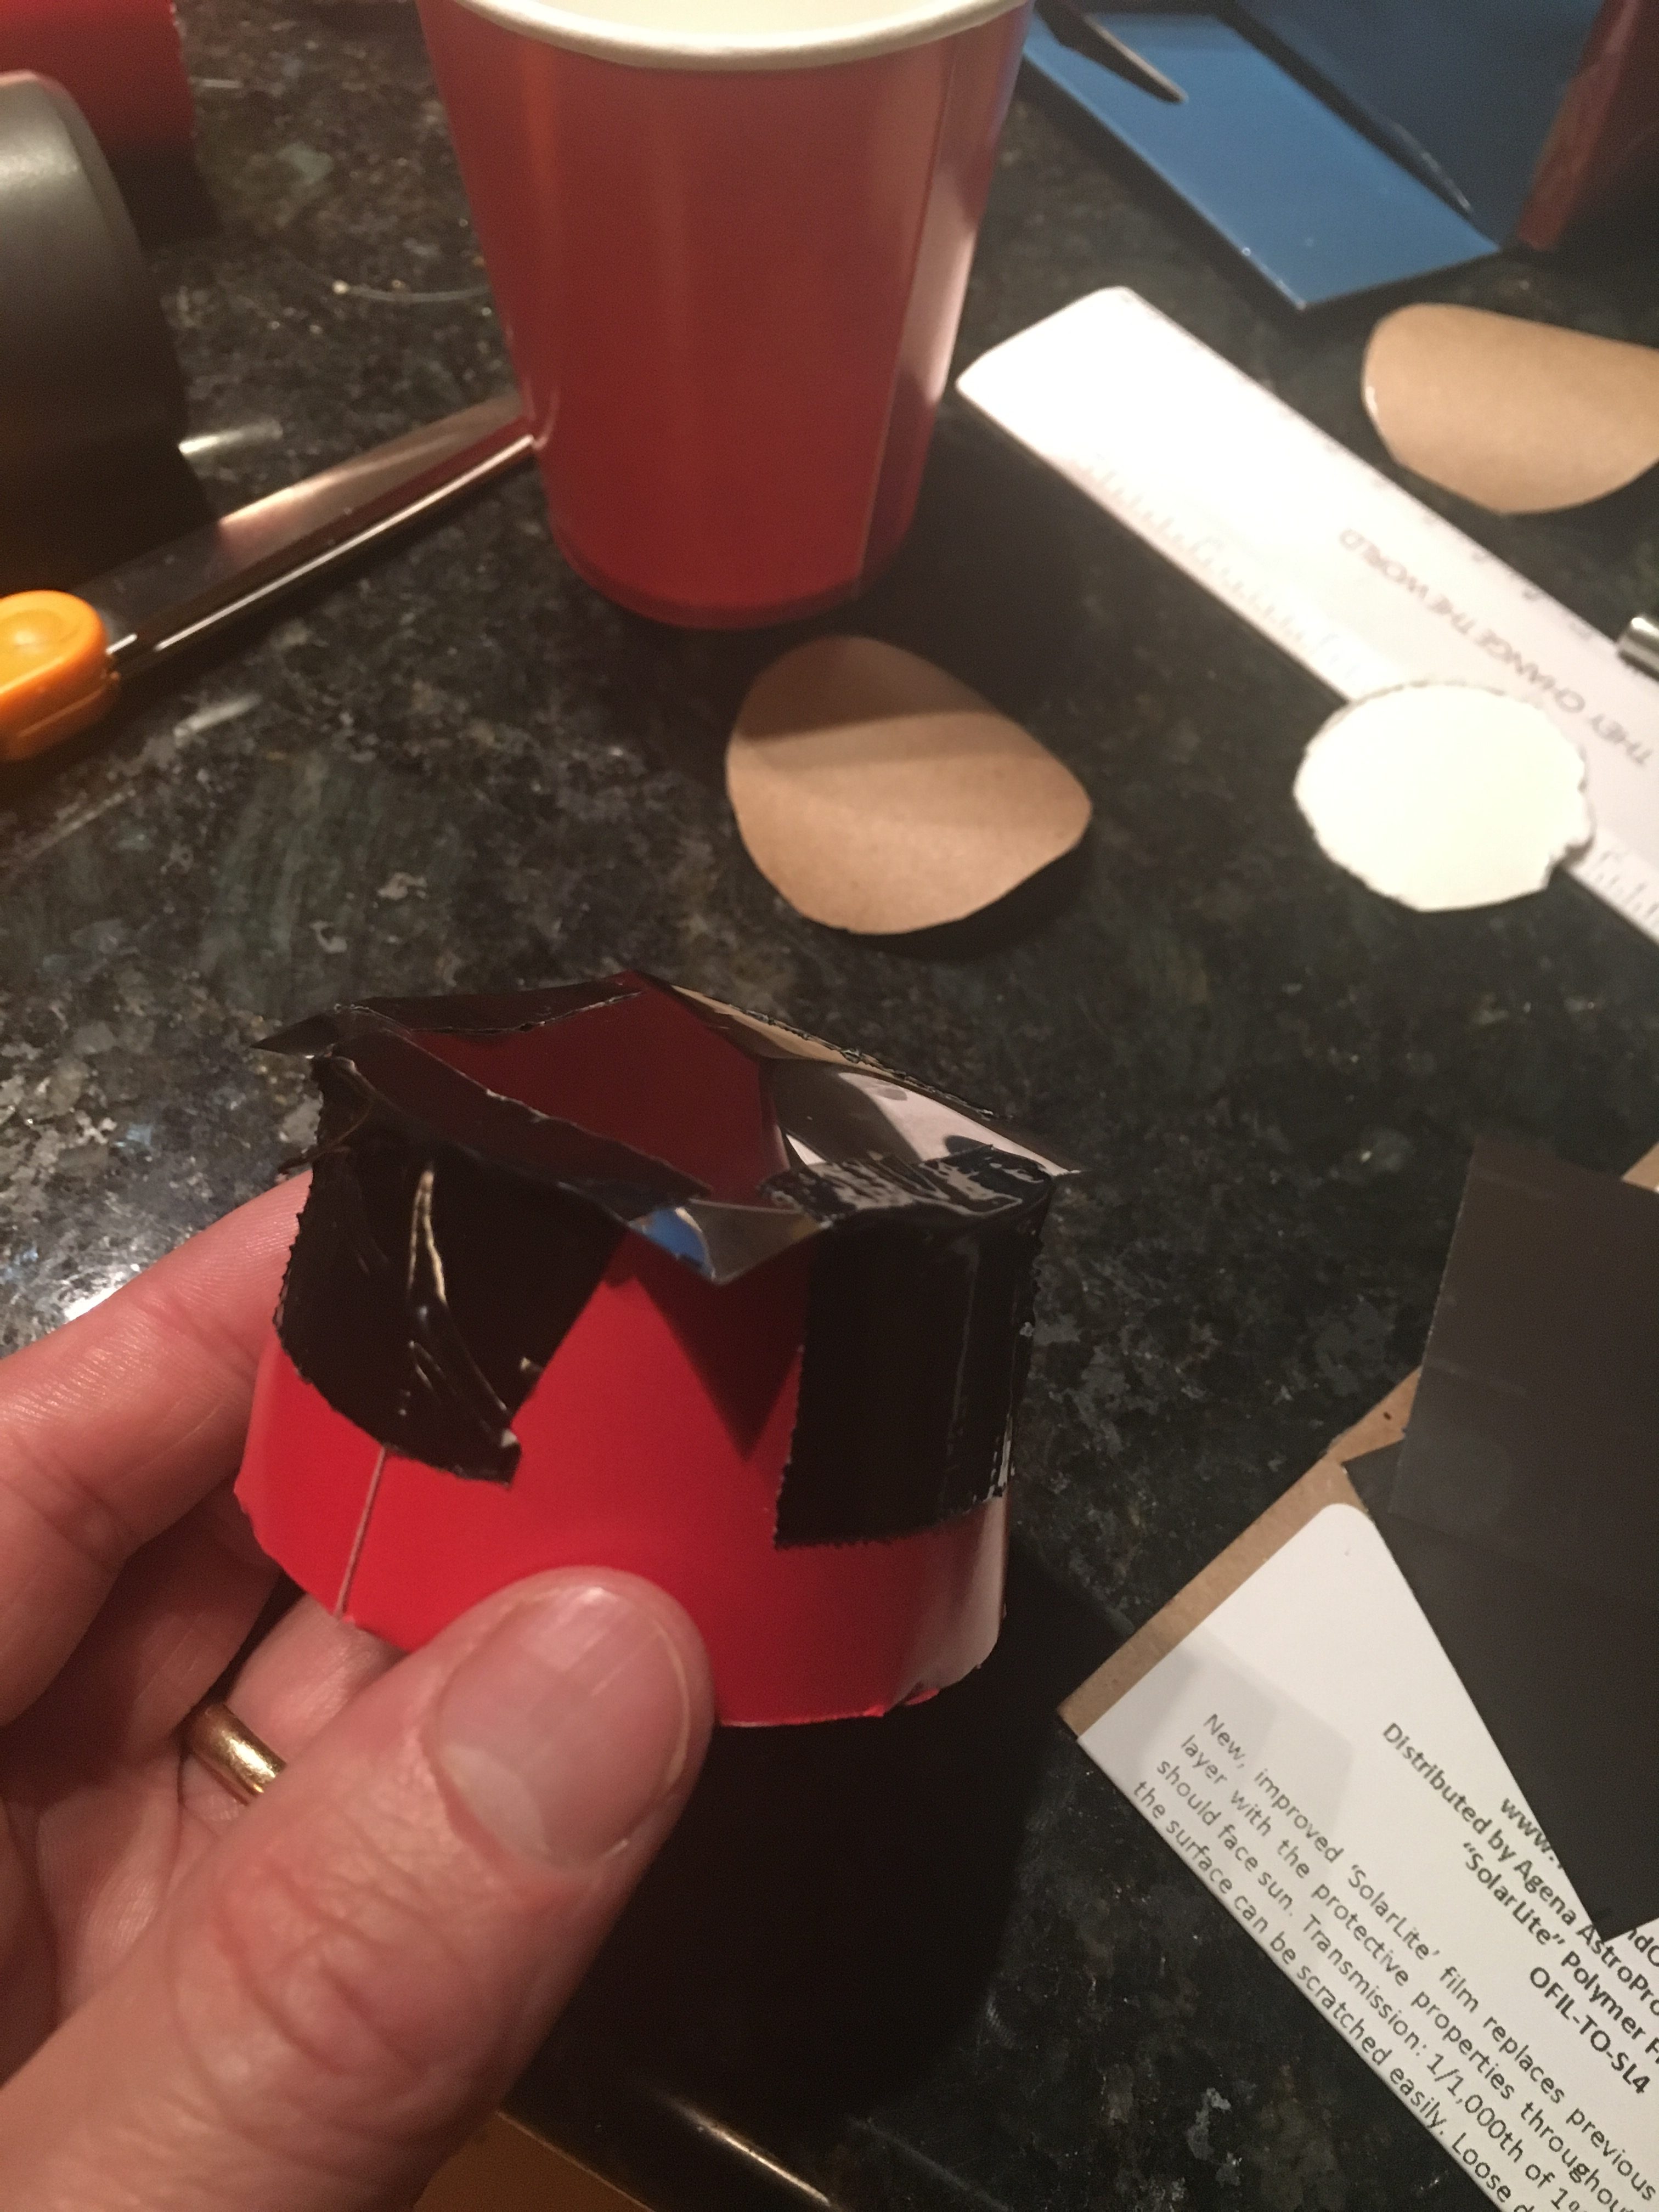

Fitting things to custom diameters is a great job for modern rapid prototyping equipment, and an exciting excuse to use lots of great Maker tools. Unfortunately, the realities of life and packing timelines dictated otherwise, as both my 3D printer and desktop CNC router happen to be temporarily down. Instead, I chose a good old standby—the Paper Cup You Find In The Pantry. This equipment, well known to eclipse chasers and birthday party planners alike, has the distinct advantage of being free, easily cuttable, and eternally available in mysteriously large quantities. Especially when combined with that other favorite material, Black Duck Tape, the last of these turns out to be a distinct advantage when generating countless late-night mistak…um…let’s say “engaging in extensive design iteration.”
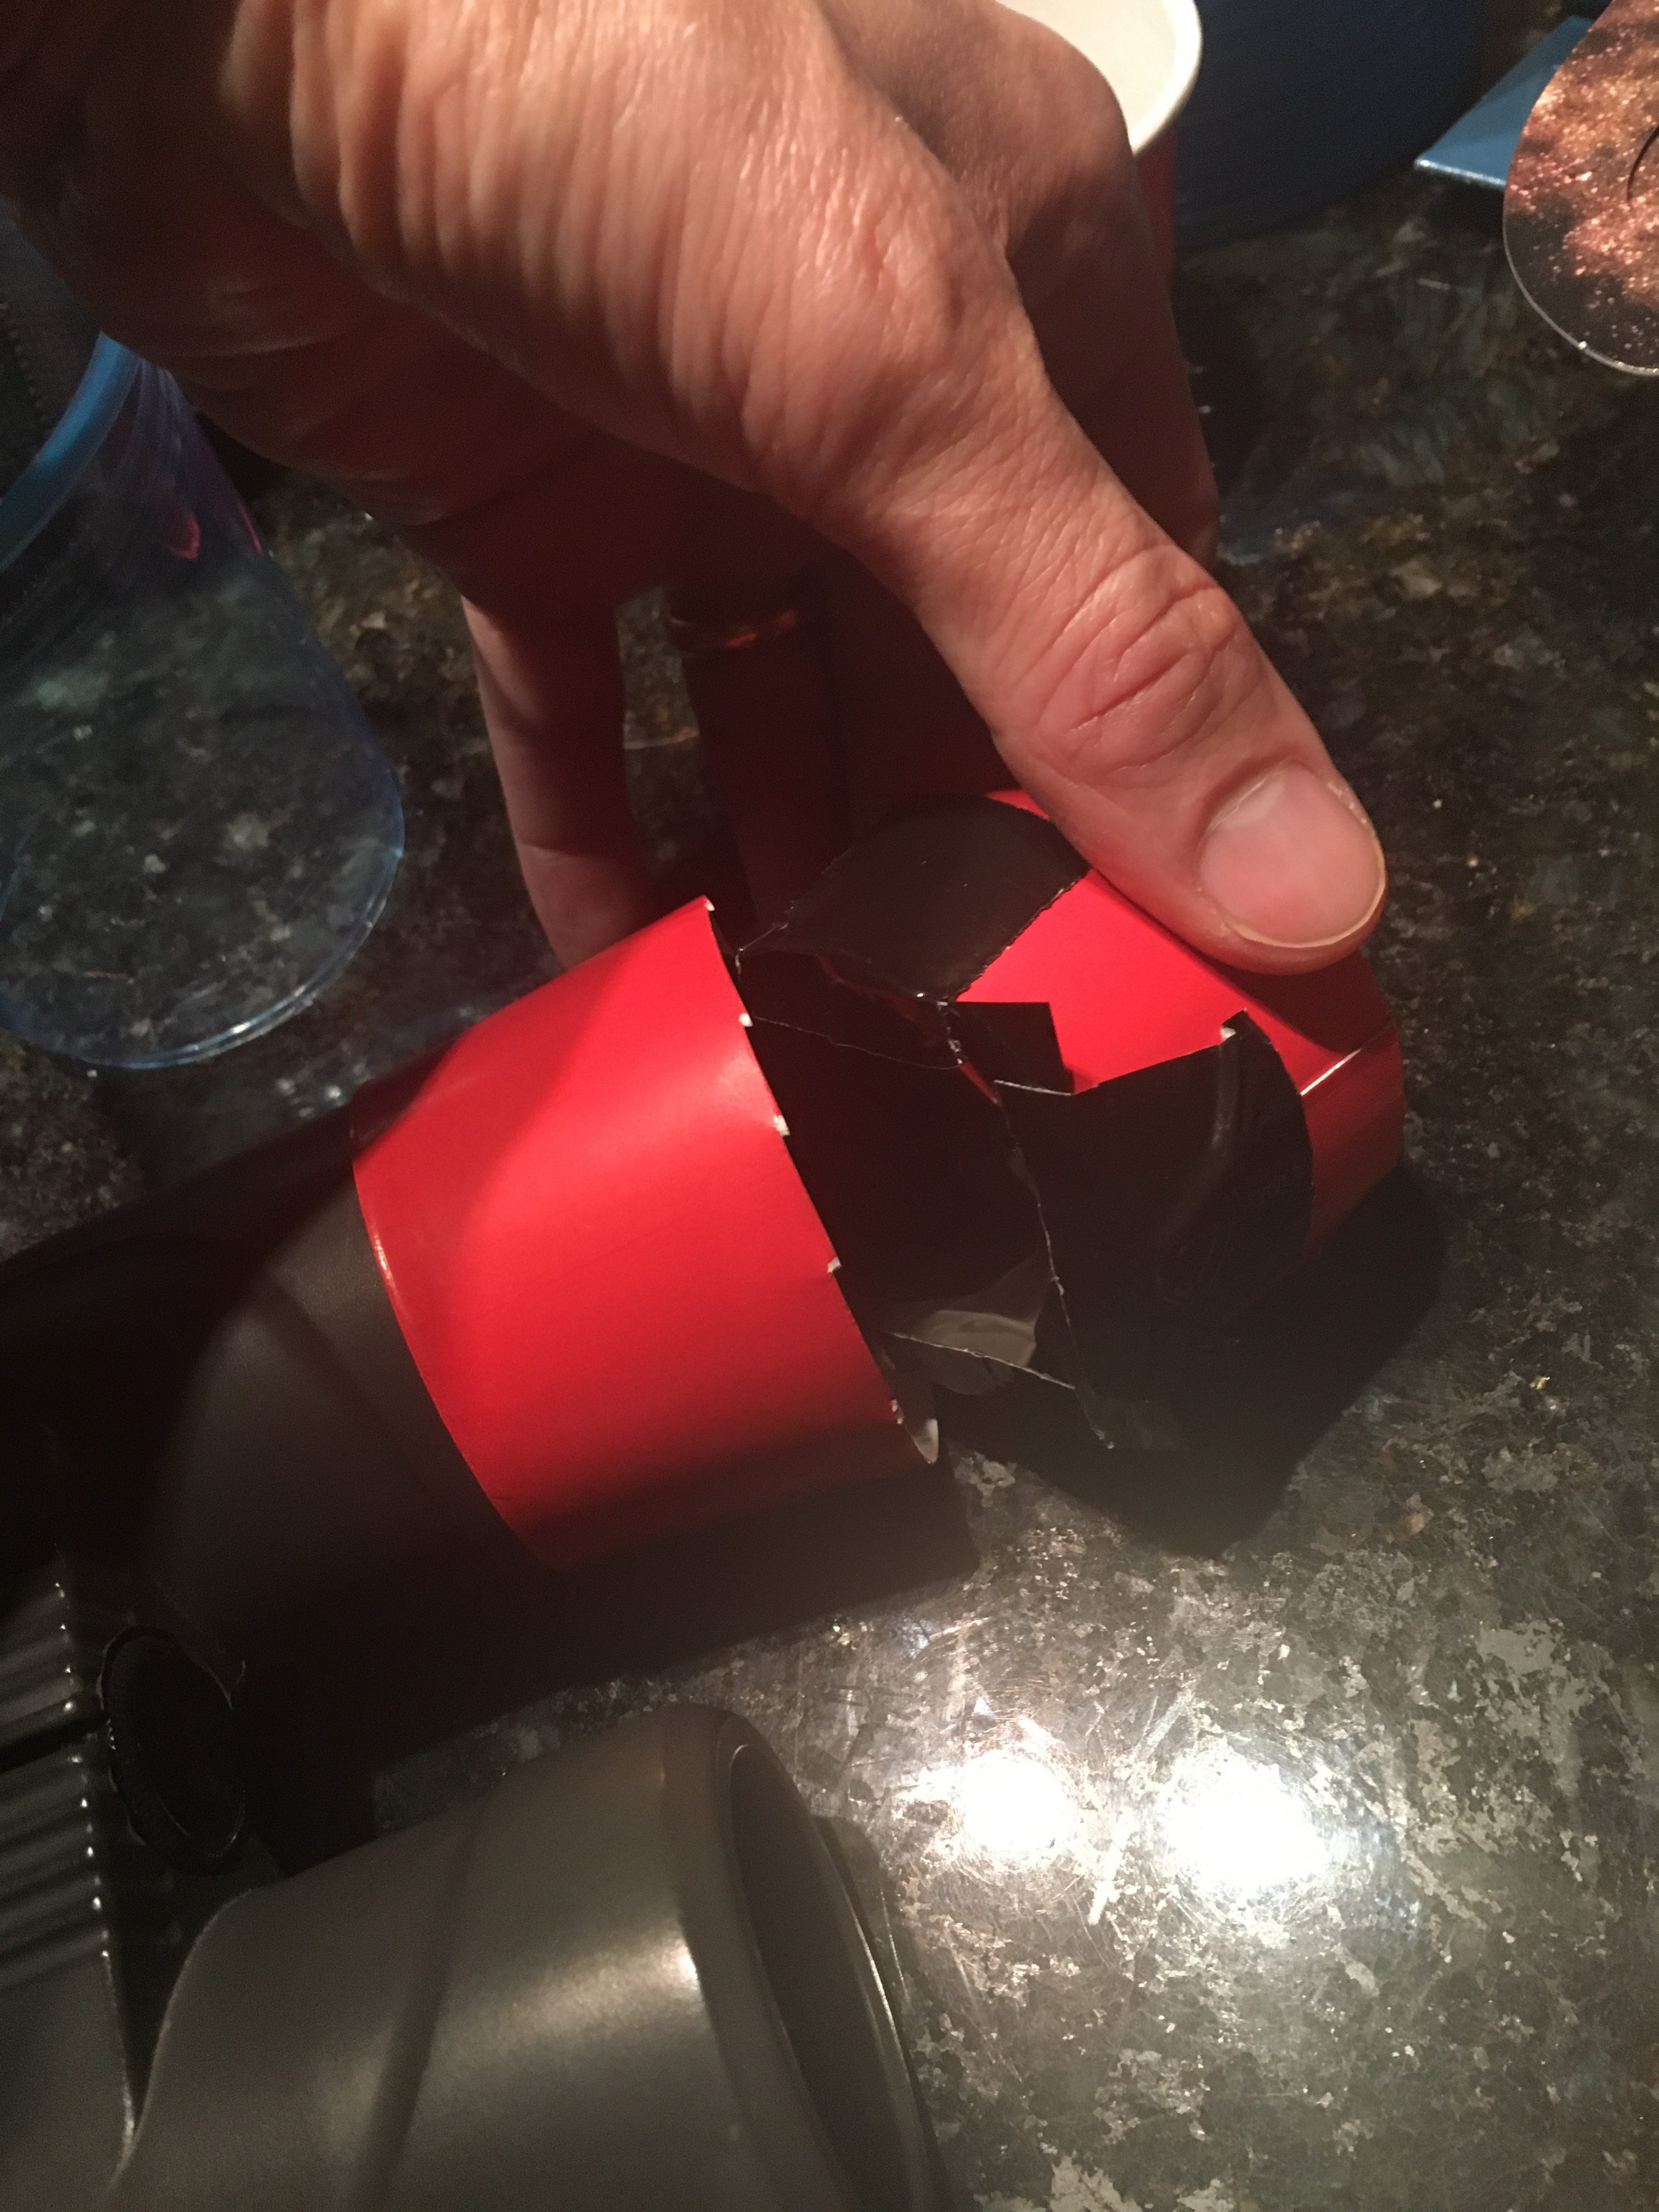
Your final filter design will be unique to your particular setup, and will dependupon the combination of your optics and the diameter of your available Paper Cups. I ended up employing two different designs, one that used two nesting cups flaring outward to ensure the filter’s security and pressure fit to the binoculars securely, and one that used the cups flaring inward in a slightly similar setup. A particular advantage of using paper cups that taper is that they can sometimes be employed more diversely. For example, I’ve found that I can repurpose one of the binocular filter setups as a camera filter by wedging it securely into the sunshade of my Panasonic Lumix camera.
The filter for our spotting scope is still a work in progress, but will similarly repurpose a large cup with a diameter ideal for fitting within the scope’s sunshade. The filter material I purchased came in squares of approximately 4 inches on a side. This makes one piece just large enough to cover the objective lens of my spotting scope, and made for just enough material to create two pairs of binocular filters with the other. (Although my filters ended up large enough that they leave almost the entire binocular lens aperture unobscured, it’s a nice classic thought exercise to consider what you will see when you cover half a telescope lens. More on that here or here—but think about and try it yourself first!)
With our filters ready, we’re set for the partial phases. Of course, we will probably also set up a pinhole projector or a reverse telescope projection at the same time — this is a great way to view the partial phases continuously as they progress. Another long-standing favorite and wonderful example of great design for sun viewing is the Sunspotter, which is a favorite for bringing the joy of sunspots and observation to young children easily and safely. There are a lot of excellent resources out there as the impending eclipse generates so much interest across the nation. For example, I wish I’d seen these great plans for building a sun funnel (or this more complex one) for continuous group observation, BTW — we’ll have to remember that for the next eclipse! Sunday afternoon is a great time to head to the hardware store (or just the pantry!) and get inspired. After all, making something to foster exploration of the world around you is one of the best ways to spend an afternoon, not to mention a great way to keep your jitters under control during the mounting pre-eclipse countdown!
